
Your cart is currently empty!
Ductless Mini-Split Installation: Expert Guide
Have you thought about improving your home’s heating and cooling with a ductless mini-split unit? Many people do, but worry about the installation. Ductless mini-splits are popular for saving energy and controlling temperatures in different areas. But, the installation might seem hard for homeowners. Don’t worry, with the right help, you can easily install one and enjoy its benefits.
Key Takeaways
- Ductless mini-split installations are a growing trend in home heating and cooling systems.
- Proper installation is crucial for efficient operation and warranty coverage.
- Factors like system size, unit placement, and refrigerant handling require careful consideration.
- DIY installation is possible for some homeowners, but hiring a professional is often recommended.
- Understanding the benefits and challenges of ductless mini-splits can help you make an informed decision.
Understanding Ductless Mini-Split Systems
Ductless mini-split systems are a new way to cool and heat homes and businesses. They don’t need big ducts like traditional systems. This makes them a great choice for many places. They have an outdoor unit and one or more indoor units for better control and saving energy.
What is a Ductless Mini-Split System?
A ductless mini-split system is a modern HVAC solution that cools and heats without a big duct network. The outdoor unit goes outside, and the indoor unit goes in the room you want to control. They’re connected by lines that carry heat and cooling.
Benefits of Ductless Mini-Split Systems
- Zoned temperature control: You can set different temperatures in different rooms with ductless mini-splits.
- Improved energy efficiency: Without ducts, these systems lose less energy, saving you money on bills.
- Compact and discreet installation: The indoor units are slim and mount on walls, fitting any decor.
- Versatility: Ductless systems work well in many places, from homes to offices and historic buildings.
- Enhanced air quality: Some models have filters that clean the air, removing allergens and dust.
Ductless mini-splits are a smart choice for those wanting efficient, flexible, and good-looking climate control. Their unique features make them popular in the market.
Types of Ductless Mini-Split Systems
Ductless mini-split systems have different setups for various homes and businesses. They come in single-zone and multi-zone types, each with its own benefits.
Single-Zone Ductless Mini-Splits
Single-zone systems have one outdoor unit and one indoor unit. They’re great for small areas or places without ducts. These systems heat or cool one room well, saving energy and giving precise control.
Multi-Zone Ductless Mini-Splits
Multi-zone systems have one outdoor unit that can connect to up to eight indoor units. Each indoor unit controls a different area. This makes them perfect for big homes, offices, or areas with changing heating and cooling needs. They use one outdoor unit for efficient climate control across the whole space.
| Feature | Single-Zone Ductless Mini-Splits | Multi-Zone Ductless Mini-Splits |
|---|---|---|
| Number of Indoor Units | 1 | Up to 8 |
| Cooling/Heating Capacity | Designed for a single room or zone | Designed for multiple rooms or zones |
| Temperature Control | Precise control for the targeted space | Independent temperature control for each zone |
| Energy Efficiency | Efficient for small, targeted spaces | Efficient for larger, multi-zone applications |
| Best Suited For | Small rooms, zones without ductwork | Larger homes, offices, or spaces with varied needs |
Choosing between single-zone or multi-zone ductless mini-splits depends on your space’s needs and how much temperature control you want. Both types are energy-efficient and flexible for your HVAC needs.
Preparing for Ductless Mini-Split Installation
Before starting a ductless mini-split installation, think about two key things: picking the right size and getting the needed tools and materials. These steps make the installation smooth and boost your system’s efficiency and performance.
Choosing the Right System Size
Choosing the right BTU output for your ductless mini-split is key. It’s important to do ductless mini-split sizing calculations right. Consider room size, insulation, and climate to find the best BTU needs. A pro or online BTU calculation tools can guide you to avoid mistakes that affect performance and energy use.
Necessary Tools and Materials
Getting the right HVAC installation tools and mini-split installation supplies is crucial. You’ll need a stud finder, hole saw, torque wrench, and a refrigerant recovery system. These DIY ductless AC installation tools make the job easier and ensure a tight, leak-free setup. Also, check the manufacturer’s instructions and local building codes for a successful install.
“Accurate load calculation helps determine the right size system; an oversized system can result in short cycling, reduced efficiency, and inadequate dehumidification.”
Choosing the right system size and getting the right tools and materials sets you up for a smooth ductless mini-split installation. This leads to reliable and energy-saving performance for years.
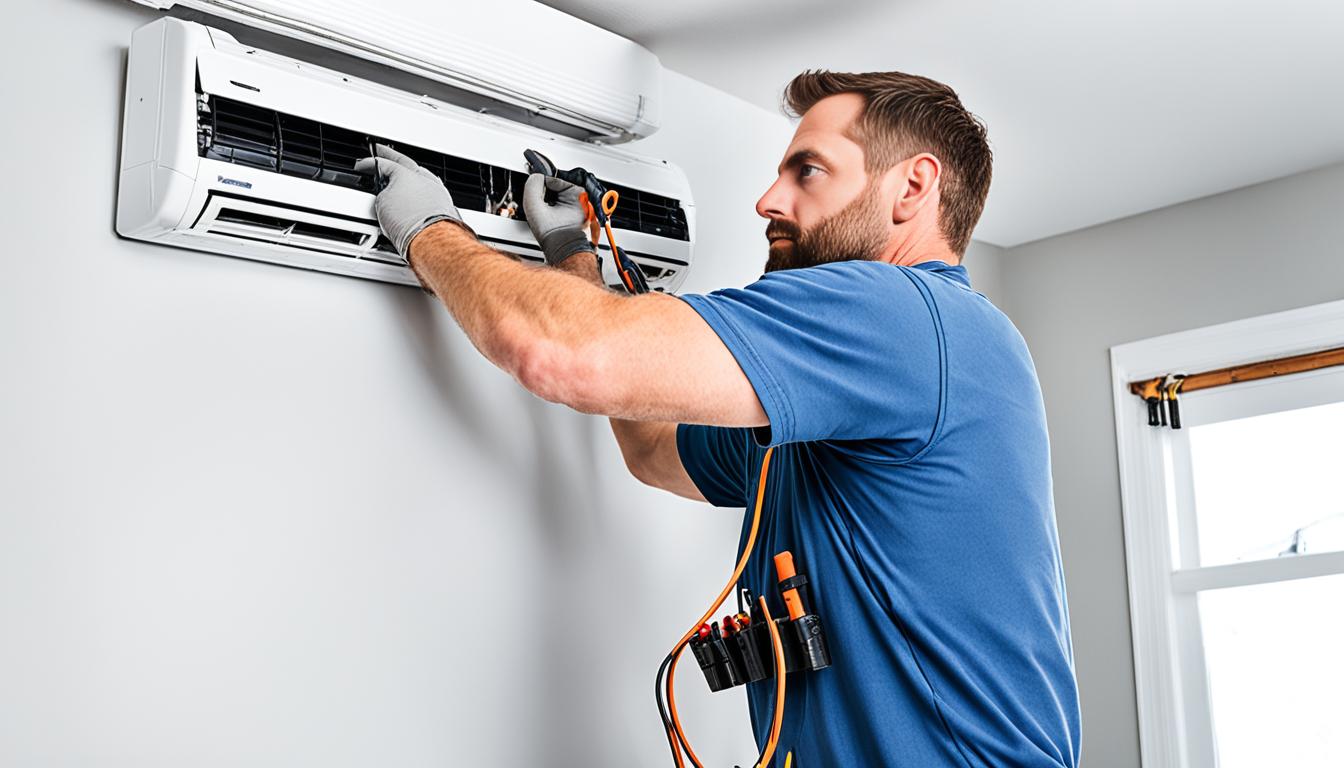
Installing the Indoor Unit
The first step in setting up a ductless mini-split system is to install the indoor air-handling unit. This task is key and requires picking the right wall spot, securing the bracket, and drilling for the lines and wiring. It’s important to make sure the unit is set up right for good drainage and performance.
For indoor mini-split unit installation, details matter a lot. The bracket must be level and strong on the wall, about 7 feet off the ground. This makes sure the unit stays put and works well. After setting the bracket, a hole is drilled in the wall for the lines and wiring to connect the indoor and outdoor parts.
The wall-mounted air handler setup is a big part of installing a ductless HVAC system. Getting the indoor unit aligned right is key for good air flow and drainage. It’s important to follow the maker’s guide closely to get the ductless HVAC indoor component install right.
| Task | Estimated Cost |
|---|---|
| Hiring a licensed electrician for a dedicated electrical circuit | $250, plus $50-$100 per hour in labor costs |
| Minimum cost for a DIY single-zone ductless AC system installation | $2,000, including necessary parts and equipment |
| Average cost for a professional ductless mini-split installation | Around $3,000, but can exceed $14,500 depending on system size |
For installing the indoor unit, you’ll need tools like a drill, hole saw, level, tape measure, and more. Always read the maker’s guide carefully, as each model has its own setup needs.
“Proper installation of the indoor unit is crucial for the overall efficiency and performance of the ductless mini-split system. Attention to detail and following the manufacturer’s guidelines are essential for a successful setup.”
By carefully planning and doing the indoor unit installation, homeowners and HVAC pros can make sure the ductless mini-split works great. It will provide reliable and energy-saving climate control for many years.
Installing the Outdoor Unit
The outdoor compressor/condenser unit is key to a ductless mini-split system. Its installation needs careful thought. Pick a spot for the outdoor unit that boosts cooling efficiency. The east or north side of the home works best for this.
Choosing the Outdoor Unit Location
When picking a spot for the outdoor unit, think about a few things. It should be in an area with good airflow, away from things that could block heat dissipation. Also, try to place it near the indoor unit to keep the refrigerant lines short and the system running smoothly.
Preparing the Outdoor Unit Installation Area
Getting the outdoor unit area ready is a big part of the installation. You might need to make a concrete pad or attach the unit to a wall for stability. Make sure the area is clear of debris or anything that could mess with the unit’s work.
To keep the unit running well, raise it at least 8 inches above where snow falls in cold areas. This stops snow from blocking the unit.
| Consideration | Recommendation |
|---|---|
| Outdoor Unit Location | East or north side of the home for optimal efficiency |
| Proximity to Indoor Unit | Minimize length of refrigerant lines for efficient operation |
| Airflow Considerations | Ensure adequate airflow around the unit, away from obstructions |
| Elevation in Cold Climates | Raise the unit at least 8 inches above the highest snowfall level |
Thinking about where to put the outdoor unit and getting the area ready helps make sure the ductless mini-split works well and reliably.
Connecting the Indoor and Outdoor Units
After installing the indoor and outdoor units of a ductless mini-split system, connecting them is the next step. This involves using refrigerant lines and electrical wiring. It’s important to do this carefully to make sure the system works well and safely.
Running the Refrigerant Lines
The refrigerant lines, or lineset, need to be carefully placed and connected between the indoor and outdoor units. These lines carry the refrigerant that moves heat around the system. It’s important to keep the lines at a downward angle to help drainage and avoid refrigerant oil buildup.
The standard cable connecting the indoor and outdoor units is a 14 AWG 4-conductor stranded cable. It usually goes through a conduit to follow local codes. The size of the refrigerant line depends on the system’s capacity. Bigger systems need thicker lines.
Connecting Electrical Wiring
The electrical wiring gives power to the ductless mini-split system. Most systems need 220 volts or more for power, with some smaller ones using 110 volts. The breaker panel must be big enough to handle the voltage needed.
Wire sizes for mini-split systems range from 2 to 16-gauge. Thinner wires handle less current, and thicker ones can handle more. Homeowners often choose non-fused disconnect boxes for safety, as the breaker in the service panel can protect the system.
The electrical whip outdoors is made of high-voltage wires in a protective case. It connects the power from the disconnect box to the condenser.
It’s a good idea to use surge protectors to protect the mini-split system from electrical surges. These surges can damage the electrical parts and make the system fail completely.
| Key Considerations for Connecting the Indoor and Outdoor Units | Details |
|---|---|
| Refrigerant Line Installation |
|
| Electrical Wiring |
|

Connecting the indoor and outdoor units of a ductless mini-split system is key to a successful installation. By carefully placing the refrigerant lines and wiring the electrical parts, homeowners can make sure their mini-split works well and safely for a long time.
ductless mini-split installation: Expert Tips
Installing a ductless mini-split system requires the expertise of HVAC professionals. They can make a big difference in the installation process. Expert tips help ensure a successful and efficient installation. These tips cover the placement of units and handling refrigerants to improve your system’s performance and lifespan.
Placement Considerations
Choosing the right spot for the indoor and outdoor units is key for a ductless mini-split system. HVAC experts suggest placing the outdoor unit in a spot with good airflow, away from sunlight and heat sources. The indoor unit should be placed to improve airflow and even out the temperature in the space.
Refrigerant Line Insulation
Insulating the refrigerant lines is vital for keeping the system efficient and preventing energy loss. HVAC pros recommend using top-quality insulation for the lines. This keeps the refrigerant at the right temperature and reduces heat transfer to the environment.
Refrigerant Handling and Charging
Handling and charging refrigerants in a ductless mini-split should be done by licensed HVAC pros. Doing it wrong can cause leaks, harm the environment, and lead to system problems. These experts have the right training and tools to safely handle refrigerants and charge the system right, ensuring it works well and lasts longer.
Manufacturer-Recommended Procedures
It’s important to follow the manufacturer’s installation steps for a ductless mini-split system. HVAC experts know these steps well. They make sure the installation, from placing units to wiring and testing, is done right. This lowers the risk of problems and helps the system work at its best.
Using these expert tips during installation can bring many benefits. Homeowners get better energy savings, more comfort, and cleaner air. Working with a skilled HVAC pro ensures a smooth and successful installation. This sets the stage for reliable and efficient performance for years to come.
Refrigerant Handling and Charging
Handling and charging refrigerants right is key for ductless mini-split systems. Knowing about the different refrigerants and how to handle them ensures your system works well and safely.
Understanding Refrigerants
Ductless mini-splits often use R-410A, a blend of hydrofluorocarbon (HFC). These refrigerants are crucial for heating and cooling by moving heat around. The type of refrigerant needed depends on the system’s maker.
Proper Refrigerant Handling
Dealing with refrigerants needs care for safety and the environment. HVAC pros must be trained and certified to handle and charge them right. Wrong handling can cause system problems, harm the environment, and be dangerous.
- Only certified HVAC techs should buy and handle refrigerants.
- Follow the maker’s instructions for the refrigerant in your system.
- Use the right tools and gear, like refrigerant recovery systems and charging scales, for safe handling.
- Fix refrigerant leaks fast to avoid system issues and environmental harm.
- Dispose of used refrigerants as per local and federal laws to lessen environmental impact.
Knowing how to handle refrigerants right helps your ductless mini-split system work efficiently and safely. It also helps the environment.
| Refrigerant Type | Common Uses | Environmental Considerations |
|---|---|---|
| R-410A | Ductless mini-split systems, central air conditioners | Lower ozone depletion potential compared to older refrigerants, but still a greenhouse gas |
| R-32 | Ductless mini-split systems, heat pumps | Lower global warming potential than R-410A, considered a more environmentally friendly option |
| R-134a | Older refrigerators, vehicle air conditioning systems | Higher global warming potential, being phased out in favor of more environmentally friendly options |
“Proper refrigerant handling is essential for the safe and efficient operation of ductless mini-split systems. Certified HVAC professionals must follow strict protocols to ensure the system’s performance and protect the environment.”
Post-Installation Testing and Troubleshooting
After installing your ductless mini-split system, it’s key to test its performance. This ensures it works efficiently. It’s vital for checking the system’s proper function and spotting future problems early.
Ductless mini-split system testing is a crucial part of this. It checks airflow, temperature, and humidity levels. This makes sure the system gives you the comfort and energy savings you want. Regular checks keep the system running well and stop issues before they start.
If you find problems during testing, fix them fast. Issues like strange noises, water leaks, or uneven temperatures and humidity need quick action. This keeps your ductless mini-split system working great, giving you steady heating and cooling.
Regular upkeep and expert checks are also key for your system’s long-term performance. Stick to the maker’s maintenance plan. This includes cleaning or replacing air filters to stop future problems and keep your system efficient and hassle-free.
| Common Mini-Split Issues | Potential Causes | Recommended Actions |
|---|---|---|
| Unusual Noises | Loose components, debris buildup | Inspect and tighten connections, clean system components |
| Water Leakage | Clogged condensate drain, improper leveling | Clear drain line, adjust indoor unit level |
| Inconsistent Temperature/Humidity | Airflow issues, refrigerant problems | Verify airflow, check refrigerant levels |
Testing and troubleshooting your ductless mini-split system after installation is crucial. It ensures it keeps working well, giving you comfort and saving energy for many years.
“Regular maintenance and professional inspections are key to maintaining the long-term performance of your ductless mini-split system.”
Maintenance and Care for Ductless Mini-Splits
Keeping a ductless mini-split system in good shape is key to its long life and efficiency. Homeowners and building owners should follow the maker’s maintenance plan and steps. This ensures the system works well, lasts longer, and stays efficient.
Here are some important tasks for maintaining ductless mini-splits:
- Clean the air filters often. Change or clean them every month, or more if your area is dusty or the system is used a lot.
- Check and clean the condenser coils. Clean the outdoor unit’s coils to remove dirt and blockages that can slow down airflow and efficiency.
- Make sure the condensate drain line is clear. This prevents water buildup and damage.
- Check refrigerant levels. A skilled HVAC technician should check and refill the refrigerant if needed to keep the system running right.
- Have annual tune-ups. Regular checks by a pro can spot and fix problems early, extending your ductless mini-split’s life.
By keeping up with these tasks, your ductless mini-split will work efficiently. This means your home stays comfy and your energy bills stay low.
“Regular maintenance, including filter cleanings and coil cleaning, is essential to prevent energy waste and possible damage to the unit.”
Following the maker’s maintenance schedule and fixing issues fast is the secret to a well-running ductless mini-split. By doing this, you can enjoy your system for many years.
Hiring a Professional vs. DIY Installation
Homeowners must decide whether to hire a professional HVAC contractor or do it themselves when installing a ductless mini-split system. While some can handle the installation, others should seek professional help. This choice depends on the complexity of the job and the homeowner’s skills.
When to Hire a Professional
Some parts of installing a ductless mini-split system, like electrical work and handling refrigerants, need a pro’s expertise. Doing these jobs wrong can be risky and might even cancel the warranty. Professional ductless mini-split installation makes sure the system works well, follows local rules, and is efficient.
DIY Installation Considerations
- Needs special tools and gear, like a vacuum pump and an EPA license for refrigerant handling.
- Some top-quality systems, like Mitsubishi, are better for pros to install because they’re complex.
- Wrong installation can cause warranty problems, harm the equipment, and be unsafe.
- Homeowners should know about local rules and codes before deciding to install it themselves.
Choosing between a professional or a DIY ductless HVAC system installation depends on your skills, the job’s complexity, and the benefits of a well-done installation.
“Handling refrigerants and electrical parts can be risky without the right skills and tools. A right installation means the system works better, saving money on bills over time.”
| Factors to Consider | DIY Installation | Professional Installation |
|---|---|---|
| Complexity | Moderately complex, needs special tools and gear | Complex, especially for systems with many zones or advanced features |
| Electrical Work | Needs some electrical knowledge | Done by licensed electricians |
| Refrigerant Handling | Needs EPA certification and the right gear | Done by certified HVAC techs |
| Warranty Implications | Could void the manufacturer’s warranty | Keeps the manufacturer’s warranty |
| Cost | Could be cheaper upfront | More expensive upfront, but might save on energy bills later |
Energy-Efficient Ductless Mini-Split Options
Homeowners and building owners are now focusing more on energy efficiency. The ductless mini-split market has answered with energy-efficient ductless mini-splits, high-SEER ductless AC units, and eco-friendly ductless heat pumps. These systems can save a lot of energy and reduce environmental harm compared to traditional HVAC setups.
ENERGY STAR says certified mini-split heat pumps can cut energy use by up to 60% compared to standard electric radiators. Also, these systems in a whole house can cut greenhouse gas emissions by more than 4,500 pounds over their life.
The federal government offers a tax credit of up to $2,000 for buying and installing ENERGY STAR certified air source heat pumps from January 1, 2023, to December 31, 2032. This makes these energy-saving ductless systems more appealing to homeowners.
Modern energy-efficient ductless mini-splits are tested to work well even when it’s as cold as 5°F. Many utility companies also offer incentives for installing these systems. This adds to the savings of these systems.
| Product | BTU Range | SEER Rating | Price Range |
|---|---|---|---|
| Mitsubishi Electric Trane HVAC US Mini-Split | 9,000 – 33,000 | Up to 30.5 | $1,199.99 – $4,499.99 |
| LG Ductless Mini-Split Heat Pump | 9,000 – 24,000 | Up to 28 | $1,299.99 – $3,499.99 |
| Daikin Ductless Mini-Split Air Conditioner | 9,000 – 42,000 | Up to 25.1 | $1,399.99 – $4,999.99 |
Choosing the right energy-efficient ductless mini-split means sizing it right for your space. This ensures it works well and keeps you comfortable. Regular maintenance also helps avoid future issues and saves money.
There are many energy-efficient ductless mini-splits, high-SEER ductless AC units, and eco-friendly ductless heat pumps out there. Homeowners and building owners can find the best ductless HVAC system for sustainable homes that fits their needs for energy efficiency and saving money.
Zoning and Temperature Control with Ductless Mini-Splits
Ductless mini-split systems are great for controlling the temperature in different areas. They let you set the climate in each room separately. This is done by connecting several indoor units to one outdoor unit, making a system that meets your comfort needs.
Ductless mini-split zoning is a big plus over traditional HVAC setups. These systems use heat pumps for both heating and cooling, which saves energy. Also, their inverter technology adjusts power based on the temperature, saving energy and money.
- Energy Star says mini-splits use up to 30% less energy than traditional ACs.
- Mini-splits offer more ways to expand than traditional HVAC systems.
- Systems with inverter technology save energy and money by adjusting power as needed.
For big homes or areas with many rooms, a multi-zone ductless mini-split system is best. These systems let you control the temperature in each zone separately. This means every room can be at the perfect comfort level.
“Zoning systems are easy to install and can save days of work compared to mini-splits. They also make customers happier, get better reviews, and reduce maintenance calls.”
Single-zone ductless mini-splits are good for controlling the temperature in one area or a small space. They can also be added to existing AC systems to improve heating and cooling control.
No matter the setup, ductless mini-splits are a smart and energy-saving choice for customized climate settings and room-by-room climate management. They use zoning to help you use energy wisely and stay comfortable in your space.
Conclusion
Ductless mini-split systems are a great choice for heating and cooling homes and businesses. They offer flexibility and efficiency. By learning about their parts, how to install them, and best practices, people can decide if they’re right for their needs.
Choosing a DIY installation or a professional service is up to you. The benefits include zoned temperature control, saving energy, and a compact design. These make ductless mini-splits a strong option in the HVAC market.
Switching to a ductless mini-split can save up to 30% on energy bills compared to old HVAC systems. It can also increase your home’s value by 5-10%. Plus, it can make your home goods last longer, saving you money in the long run.
Ductless mini-splits are known for their energy-saving features. They don’t need ductwork and have advanced filters to improve air quality. Working with experienced professionals for installation ensures a good result and gets the most out of your system.
FAQ
What is a ductless mini-split system?
A ductless mini-split system is a way to cool and heat your home without the need for big ductwork. It has an outdoor unit and one or more indoor units. This makes it different from traditional central air systems.
What are the benefits of ductless mini-split systems?
Ductless mini-splits offer many advantages. You can control the temperature in different areas, they save energy, and they’re easy to install.
What are the different types of ductless mini-split systems?
There are two main types of ductless mini-splits. Single-zone systems have one indoor unit and one outdoor unit. Multi-zone systems have more indoor units but only one outdoor unit.
What factors should be considered when choosing a ductless mini-split system?
When picking a ductless mini-split, make sure it’s the right size for your space. Also, get all the tools and materials you need. It’s important to choose the right BTU output for good heating and cooling.
How do I install the indoor unit for a ductless mini-split system?
First, mount the indoor unit in the right spot on your wall. Secure the bracket and drill a hole for the lines and wiring.
How do I install the outdoor unit for a ductless mini-split system?
Choose a spot for the outdoor unit that helps with cooling. It should be on the east or north side of your home. Make sure the area is ready, possibly by building a concrete pad or securing the unit to a wall.
How do I connect the indoor and outdoor units of a ductless mini-split system?
After installing the units, connect them with refrigerant lines and wiring. Make sure the lines go down at an angle for drainage. Connect the wiring correctly between the units.
What expert tips can help ensure a successful ductless mini-split installation?
For a successful install, think about where you place the units. Insulate the refrigerant lines well. Follow the maker’s instructions for handling refrigerants and charging the system.
How do I handle and charge the refrigerant in a ductless mini-split system?
Know the different refrigerants and how to handle them safely. This is key for a good install. Wrong handling can cause problems with efficiency, the environment, and safety.
How do I test and troubleshoot a ductless mini-split system after installation?
Test the system to make sure it works right. Check the airflow, look for leaks, and watch the temperature and humidity control. If there are problems, know how to fix them.
How do I maintain and care for a ductless mini-split system?
Keep your ductless mini-split running well with regular maintenance. Clean the filters, check the refrigerant, and do other maintenance as the maker suggests.
When should I hire a professional for a ductless mini-split installation?
Sometimes, you can install a ductless mini-split by yourself. But, if you need to do electrical work or handle refrigerants, it’s best to get a professional HVAC contractor.
What are the energy-efficient features of ductless mini-split systems?
Ductless mini-splits are getting more energy-efficient. They have high SEER ratings and use new refrigerants. This means they save energy and are better for the environment than traditional HVAC systems.
How do ductless mini-split systems provide zoned temperature control?
Ductless mini-splits let you control the temperature in different areas. By using multiple indoor units with one outdoor unit, you can adjust the climate in each room to what you like.
Best practices for mini-split installation DIY mini-split installation Ductless cooling system installation Ductless HVAC installation Expert mini-split installation tips Mini-split air conditioner setup Mini-split heat pump installation guide Mini-split system installation Professional mini-split installation services